

Welcome to the April 2019 Artisan Blog Hop!
The Stampin’ Up! 2019 Artisan Design Team has so many amazing creations for you to see! I hope that you take the time to check out all 16 blogs! This blog hop will feature the Needlepoint Nook Suite from the 2019 Occasions Catalog!
My random thought: I almost didn’t order this suite…I debated, and debated…but I am so glad I stopped debating…because I love it and all the creations and inspiration from the rest of the 2019 Artisan’s. This suite is retiring on June 3rd, or while supplies last…so if you like what you see, order soon!

If this is your first time stopping by my blog, I truly want to thank you for being here! I am so very honored. I do my best to provide inspiration as well as step-by-step instructions to my creations so that you can make them too!
- You can also subscribe to my Newsletter and Blog Updates Here.
- You can view my PDF Tutorial Library Here.
- You can subscribe to my YouTube Channel Here.

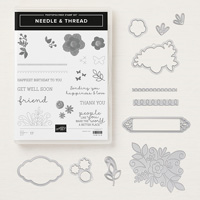
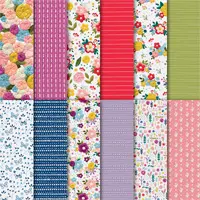
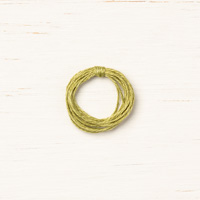
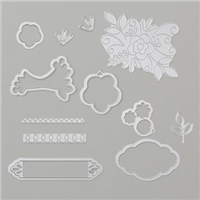
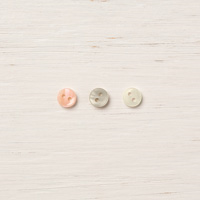
The Needlepoint Nook Suite consist of the Needle & Thread Bundle, Needlepoint Nook Designer Series Paper, Needlepoint Nook Mini Buttons, Old Olive Linen Thread & Needlepoint Nook Cardstock Pack. All are discontinued and only available until June 3, 2019 or While Supplies Last.
The Needlepoint Nook Designer Series Paper is so nice because it offers so many varieties of color combinations. I decided to use the beautiful and bright piece of stitched Poppy Parade. Lately my creations have been using a lot of white, so I decided to go with a drastic change and add a nice bright pop of color.

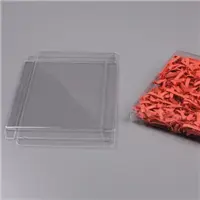
Cut a piece of the Poppy Parade Needlepoint Nook Designer Series Paper to 5 3/4 x 10. Score at 5/8, 5, 5 5/8, . Fold at the score lines and slide into the Acetate Card Box.
Wrap an 11″ piece of Poppy Parade 1/2″ Textured Weave Ribbon around the Acetate Card Box, adhering end-to-end (so it will be hidden under the focal image) with a Mini Glue Dot.
Wrap 3 loops of Old Olive Linen Thread around the Poppy Parade Ribbon, securing as shown with a bow.
Use the Stamparatus to stamp the leaf images & sentiment in Old Olive Ink, large flowers in Poppy Parade Ink, and smaller flowers in Crushed Curry Ink. Crop with a Die Cutting Machine, Plate and coordinating dies from the Needlepoint Elements Dies Set (Part of the Needle & Thread Bundle). Layer and adhere as shown with Stampin’ Dimensionals.
Use the Pretty Label Punch to crop the sentiment (the dies only emboss and stitch). Adhere as shown with Stampin’ Dimensionals.
Tie pieces of Old Olive Linen Thread to the center of three Needlepoint Nook Buttons. Adhere to the center of the flowers with Mini Glue Dots.
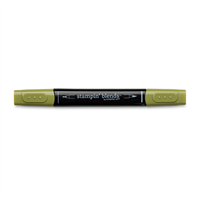
Add Daffodil Delight Gingham Gala Adhesive-Backed Flower Sequins as shown. Color Pearl Basic Jewels with a Dark Old Olive Stampin’ Blends Marker. Adhere to the center of the flower sequins.

I love all the color options offered in this Designer Series Paper. Stampin’ Up!’s samples in the graphic below is the perfect example of the multitude of bright or subtle colors you can use with this suite. I am anxious to create another Acetate Card Box with the blue butterfly design from this Designer Series Paper Set.

Click on the image above to see all the products included in the Needlepoint Nook Suite via my Online Store. Keep in mind, they are being discontinued at the end of the 2019 Occasions Catalog run (June 3rd) and are only available While Supplies Last. Snag them while you still can!

The cards that created to slip inside the Acetate Card Box mimic the look and feel of the decor I used on the box. I stuck with the same colors, shapes and elements, but added a few more options available in the bundle. Do you see that Designer Series Paper playing peek-a-boo on the sides of the card? It is the same Designer Series Paper used on the Acetate Card Box but since it was so prominent on the box, I decided to make it subtle on the card.
Don’t you love that stitched design on the card layer? So easy to create with the die included in the bundle!
Cut a piece of Poppy Parade Cardstock to 4 1/4″ x 11″. Score and fold at 5 1/2″.
Cut a piece of the Poppy Parade Needlepoint Nook Designer Series Paper to 4 1/4″ x 5 1/2″. Adhere to the card base with Snail Adhesive.
Cut a piece of Poppy Parade Cardstock to 4 1/8″ x 5 3/8″. Wrap with a piece of Poppy Parade 1/2″ Textured Weave Ribbon adhering with Snail to the backside.
Use a Clear Block A to stamp the small flowers in Crushed Curry Ink. Crop with a Die Cutting Machine, plate and coordinating dies. Crop the additional pieces shown using the dies: label, leaves (Needlepoint Elements) and Needlepoint Nook Designer Series Paper.
Wrap Old Olive Linen Thread around the Poppy Parade Ribbon, threading and tying via the ends of the label die cut.
Use a Clear Block G to stamp “friend” in Versamark Ink onto Vellum Cardstock. Cover with White Stampin’ Emboss Powder, flick to remove the excess, and set with a Heat Tool. Use a Die Cutting Machine and the stitched dies to surround the sentiment. Crop with the Pretty Label Punch. Crop a piece of Needlepoint Nook Designer Series Paper with the Pretty Label Punch. Adhere together with Mini Glue Dots.
Use a Clear Block G to stamp the “Happiest Birthday” in Old Olive Ink onto Whisper White Cardstock. Trim to size & flag the end with the Classic Label Punch.
Assemble all die cuts as shown, adhering with Mini Glue Dots. Mini & Regular Stampin’ Dimensionals.
Use a Clear Block A to stamp the butterflies in Poppy Parade Ink. Add Gingham Gala Adhesive-Backed Flower Sequins as shown. Color Pearl Basic Jewels with a Dark Old Olive Stampin’ Blend. Adhere to the center of the sequins.

Click on the image below to view the Needle & Thread Bundle in my online store!

Be sure to check out all the 2018-2019 Annual and 2019 Occasions Catalog products that are retiring. You can view them in my online store by clicking the image below.

Be sure to click on the buttons below to visit the rest of the Stampin’ Up! 2019 Artisan Design Team to see the entire blog hop line-up and to gain oodles of inspiration for the Well Said and Dear Doily Bundles!

Click on the name of the Artisan below to visit their blog and see what amazing projects they have created to inspire you!
Place an online store order valued at $50 or more (before shipping and tax), enter the host code D7CYUUCT and you will earn YOUR CHOICE of ANY Current Item valued at $10 or less! Click on the image below to learn more about how you can earn Monthly Hoot Loot for FREE!

Click on the image below, it takes you right to my store so you can begin shopping NOW!

Want the Ultimate Bundle, the best deal? Get $125 worth of product for just $99+ tax and FREE Shipping! Then save 20-25% on future purchases, with no obligation to buy, sell or stay active…do it for the discount and for you!

THREE IS BETTER THAN ONE! Become a part of Stampin’ Up!, The Hootenannies, & Mary Fish’s Pals Stamping Community!
- Purchasing the starter kit! Joining Stampin’ Up! includes access to exclusive Stampin’ Up! ideas and resources!
- Purchasing the starter kit and joining through me includes access to the Hootenannies AND the Stampin’ Pretty Pals Pals private Facebook groups and community. Immerse yourself at any level you like in daily stamping discussion, prizes, polls, ideas and inspiration, recognition, friendship, and fun!

Have a Hoot-a-Riffic Day!


Oooh that Poppy Parade background is stunning and I love how you’ve managed to still make those flowers pop on such a bold background
Stesha, I love every lovely detail on these! The gorgeous pop of color, the beautiful layering, it’s all amazing!
Wow stunning colour choice Stesha, looks fabulous x
Love, love, love your Poppy Parade creations and especially how you use the stitched embossing dies for the details. Love the die cuts from the dsp as well.
Great! Love that you used this poppy red on your card!!