

Welcome to the Pals’ Blog Hop! We’re so glad you’re here because we made some great projects for “Layer It Up” – showcasing our favorite Designer Series Paper and embellishments. You may be starting the hop here or coming from a previous Pal’s blog. Either way, you’ve come to the right place. You’ll find the full line-up below to help you move, or “hop” along from Pal to Pal.

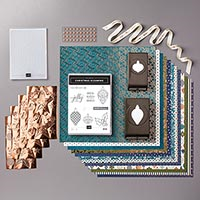
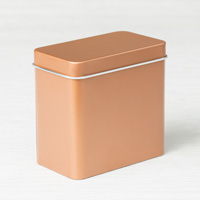
I cannot believe it took me this long to purchase and create with the Copper Tea Tins from the Annual Catalog. The fact that they have been available for a year-and-a-half and I never bothered to add them an order until now completely baffles me! First, I had no idea they came in a set of FOUR and that they were sized to fit 3 x 3 note cards. Shows how much I paid attention. Second, they pair perfectly with the stunningly, gorgeous and ever-so-popular Brightly Gleaming Suite. My creations today show you just how well they work together!


Begin by wrapping a 2 1/2 x 12 piece of Brightly Gleaming Specialty Designer Series Paper around a Copper Tea Tin, securing it with Tear & Tape Adhesive. (Leave the seam in the front so that it will be covered by the focal point you will create in the next step).
Crop a piece of Very Vanilla Cardstock using a die-cutting and embossing machine and the largest Stitched Shapes Circle die. Adhere with Snail Adhesive.
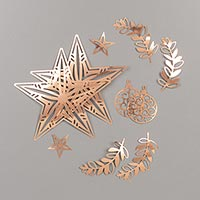
Pop out four sprigs from Brightly Gleaming Foil Elements. Adhere around the circle die-cut using Mini Glue Dots that has been rolled between your fingers to remain hidden behind the sprigs.
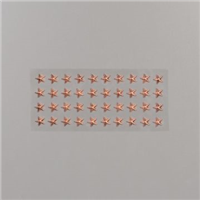
Adhere three Star Designer Elements as shown. (LOVE these elements, a must-have).
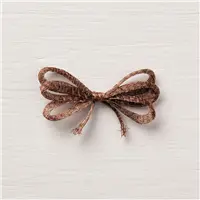
Wrap the top with the 1/2″ Classic Weave Ribbon, securing it with Mini Glue Dots. Tie a bow and adhere as shown with a Mini Glue Dot. (It is easier to tie a bow separately so that you can manipulate it to show the words in the proper direction).
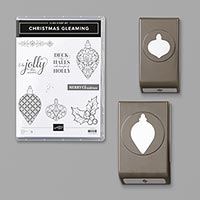
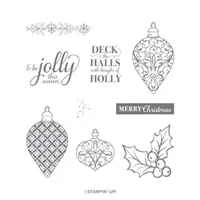
Use a Clear Block D (or a Stamparatus) to stamp the largest ornament (Christmas Gleaming Stamp Set) in Versamark Ink onto a piece of Gold Foil that has been rubbed with an Embossing Buddy. Cover with Copper (or Clear) Stampin’ Emboss Powder, flick to remove the excess and set with a Heat Tool.
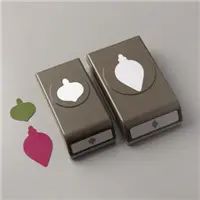
Crop with the coordinating Gleaming Ornaments Punch. Adhere with Stampin’ Dimensionals.
Stamp the “Merry Christmas” sentiment in Pretty Peacock Ink onto a piece of Very Vanilla Cardstock. Snip with Paper Snips. Adhere with Mini Stampin’ Dimensionals.

Cut a piece of Very Vanilla Thick Cardstock to 6″ x 11″. Score at 3″, rotate and cut every 3″ to create THREE 3″ x 3″ card bases.
Cut three pieces of Brightly Gleaming Specialty Designer Series Paper to a 2 7/8 square. Adhere with Snail Adhesive.
Crop three pieces of Copper Foil with a die-cutting machine and the largest Stitched Shape Square Die. Adhere with Stampin’ Dimensionals.
Crop three pieces of Brightly Gleaming Specialty Designer Series Paper with a die-cutting machine and the 2nd largest Stitched Shape Square Die. Adhere with Stampin’ Dimensionals.
Use a Clear Block C (or a Stamparatus) to stamp the smallest ornament (Christmas Gleaming Stamp Set) in Versamark Ink onto a piece of Gold Foil that has been rubbed with an Embossing Buddy. Cover with Copper (or Clear) Stampin’ Emboss Powder, flick to remove the excess and set with a Heat Tool.
Crop with the coordinating Gleaming Ornaments Punch. Adhere with Stampin’ Dimensionals.
Stamp the “Merry Christmas” sentiment in Pretty Peacock Ink or Night of Navy Ink onto a piece of Very Vanilla Cardstock. Snip with Paper Snips. Adhere with Mini Stampin’ Dimensionals.
Tie three bows of 1/4″ Copper Trim (currently on backorder) and adhere with Mini Glue Dots.
More inspiration awaits! Use the Blog Hop Line-up below to visit the rest of this month’s Design Team. My fellow Pals are excited to show you what they’ve created! Don’t forget to show us some love by commenting on our creations.
Mark your calendars for Wednesday, December 11th, for our Retirement Fun Fold Party when our Design Team showcase projects using retiring products from the Holiday Catalog with a fun fold card. Don’t miss the fun!
November 2019 Pals Blog Hop Line-Up:
- Mary Fish at Stampin’ Pretty
- Lynn Kolcun at Avery’s Owlery
- Debra Simonis at Deb’s Stampin’ Grounds
- Karen Hallam at Karen’s Stamping Habit
- Sara Stuart at Sentiments by Sara
- Mary Hanson at Up North Stampin’
- Jen Roque at Stamp Camp with Jen
- Beth McCullough at Stamping Mom
- Debbie Mageed at Secrets to Stamping
- Jennifer Michalski at Stamping Serenity
- Tricia Chuba at ButterDish Designs
- Katy McGloin at Just Fun Stamping
- Rae Harper Burnet at Wild West Paper Arts
- Su Mohr at Aromas And Art
- Wendy Klein at Doggone Delightful Stampin’
- Stesha Bloodhart at Stampin’ Hoot! – ***YOU ARE HERE***
- Lisa Ann Bernard at Queen B Creations
- Jackie Beers at Blue Line Stamping
- Jeanie Stark at Just Stampin’
- Leah O’Brien at Ink, Paper, Stamps, Oh My!
- Lori Pinto at LollyPop Paper and Ink
- Rosanne Mulhern at Heartfelt Stamping
- Pamela Sadler at Stampin Pink Rose
- Ann Murray at Murray Stamps Ink


Multiple gifts in one! What a deal! These are all so pretty the recipient will not want to use them. Thank you for sharing the pdf!
Just beautiful! Thanks for info on the tins. I didn’t know that either. Thought they were much bigger. Thanks for sharing.
Great use of the Copper Tin, Stesha! I overlooked it also, until now!
Stunning gift set, Stesha! Time for me to pull out one of my tins, LOL!!!
Fantastic project Stesha!
Love these tins and your projects are OTT gorgeous! Love them!!
Stunning gift set. I love everything about this project.
Enjoyed your fun comments about those adorable tins and your cards are gorgeous!