TGIF! It’s time for a project challenge – Gift Card Holder.
I wanted to create something interactive and fun, so I scoured the blog of fellow Stampin’ Pretty Pal and my friend, Julie DiMatteo, aka The Paper Pixie. She did a fabulous job showing how to create a double slider gift card holder, so I took a shot at it…I was pleasantly surprise at how easy this was to make. You can see her original blog post, along with her video tutorial here.


Begin with a 3 3/4 x 7 3/4 piece of Basic White Thick Cardstock. Score along the 7 3/4 side at 3/8, 2 7/8, and 5 3/8.
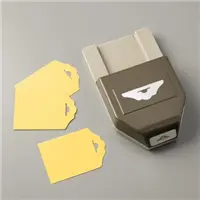
Burnish the folds with a Bone Folder. Crop the center of top and bottom of the end fold with the Essential Tag Punch. (see Julie’s video for instructions)
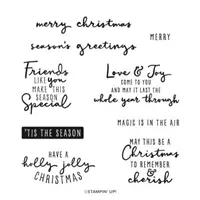
Cut a piece of Basic White Cardstock to 2 1/4 x 3 1/2. Adhere a 2 1/8 x 3 3/8 piece of Basic White Cardstock with Multipurpose Liquid Glue. Stamp the sentiment (Christmas to Remember) in Cherry Cobbler Ink onto the bottom as shown.
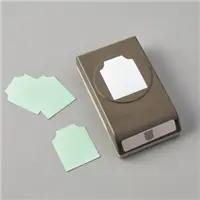
Cut a piece of Basic White Cardstock to 2 1/4 x 4 1/4. Crop the top with the Fancy Tag Topper Punch (see Julie’s video on how to crop the larger width piece).
Assemble and adhere together the Double Slider Gift Card holder as shown by Julie. (I could not do a better job explaining than her).
My Own Touch:
Adhere a 2 3/8 x 2 7/8 piece of the Buffalo Plaid Pattern Party Designer Series Paper to the front and back panel of the gift card holder with Multipurpose Liquid Glue.
Use a Stampin’ Cut & Emboss Machine and the 2 3/8 Layering Circle Die to crop a piece of Basic White Cardstock. Cut 1/8 off for a straight edge and adhere as shown with Multipurpose Liquid Glue.
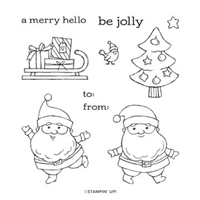
Stamp the Santa in Tuxedo Black Memento Ink onto a piece of Basic White Cardstock.
Color with the following Stampin’ Blends Combo Packs: Real Red, Cherry Cobbler, Basic Black, Smoky Slate, Petal Pink, Color Lifter
Snip out closely with Paper Snips. Adhere with Stampin’ Dimensionals.
Stamp the “Joy” sentiment (Merriest Moments) in Tuxedo Black Memento Ink onto a 1 1/4 x 5/8 piece of Basic White Cardstock. Adhere with Stampin’ Dimensionals.
Thread three pieces of Black & White 1/4 Gingham Ribbon through the tag topper, securing with a bow of White Baker’s Twine.
Embellish with Classic Matte Dots.

I have fallen in love with this double slider gift card holder and still cannot believe how easy they are to make. What is your favorite way to encase a gift card? Have you tried this?


The adorable Be Jolly Stamp Set is RETIRING! It is available through January 3, 2022 or WHILE SUPPLIES LAST! You can see my previously shared creation using this stamp set below.


Price: $18.00