TGIF! It’s time for an INSPIRATION Challenge!
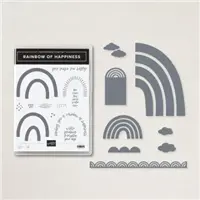
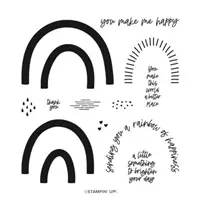
Rainbows = Make a Wish! I hadn’t played around with the Rainbows of Happiness Bundle (that I remember). I was desperate to give it a go and although I am a little late in getting this post up, I am happy to share what I came up with. A shaker card featuring the NEW 2022-2024 In Colors from Stampin’ Up! as well as a farewell to the Playful Alphabet Dies.
Fellow TGIFC Designer Dani Dziama must have been on the same wave length as me..you can check out her fabulous rainbow here.


What are your thoughts on these fabulous, bright and beautiful 2022-2024 In Colors? I LOVE THEM! They will be available to customers on May 3, 2022! Get your wish lists started, you need them all!

Begin with a 4 1/4 x 11 piece of Basic White Thick Cardstock. Score and fold at 5 1/2.
Adhere a 4 x 5 1/4 piece of Starry Sky Cardstock to the card base with Multipurpose Liquid Glue.
Use the large Brilliant Rainbow Die and a Stampin’ Cut & Emboss Machine (Mini or Standard) to crop the following: 3 3/4 x 5 piece of Basic White Thick (positioned properly), Sweet Sorbet, Parakeet Party, Tahitian Tide and Orchid Oasis.
Use the piece of Basic White as a “template” to glue the Sweet Sorbet, Parakeet Party, Tahitian Tide and Orchid Oasis to the card with Multipurpose Liquid Glue.
Use a Paper Trimmer to cut two pieces of Window Sheet to 3 5/8 x 4 7/8. Adhere one piece to the back of the Basic White die-cut piece with Multipurpose Liquid Glue. Add Foam Adhesive Strips onto the Window Sheet along the edge of each rainbow. Fill with Sparkle and Shine Sequins. Adhere the other Window Sheet to the other side of the Foam Adhesive Strips. Adhere to the card with Multipurpose Liquid Glue.
Use the Cloud Punch to crop two clouds from Basic White Thick Cardstock. Cut in half (bottom to top) and adhere as shown with Multipurpose Liquid Glue. Use a Mini Stampin’ Cut Machine and the cloud dies (Brilliant Rainbow Dies) to crop five clouds from Basic White Cardstock. Adhere four as shown with Multipurpose Liquid Glue and Stampin’ Dimensionals.
Adhere 1 1/4 squares of Sweet Sorbet, Parakeet Party, Tahitian Tide and Orchid Oasis Cardstock to a 1 1/4 square of Foam Adhesive Sheet. Crop with a Mini Stampin’ Cut Machine and the “WISH” Playful Alphabet Dies. Adhere as shown.
Adhere a 3 x 3 piece of Daffodil Delight Cardstock to a 3 x 3 piece of Foam Adhesive Sheet. Crop with a Mini Stampin’ Cut Machine and the “BIG!” Playful Alphabet Dies, along with the smallest Layering Circle Die. Cut the circle in half. Adhere to the card as shown. Use the leftover pieces of Daffodil Delight to cut “sunbursts” as shown.
Adhere the 5th cloud to the sun with Multipurpose Liquid Glue. Trim as needed with Paper Snips.


Did you know the Playful Alphabet Dies are retiring? Sniff, Sniff! I am sad to see them leave the catalog, but this set of dies will not be leaving my stash, EVER. It’s too valuable an asset in my craft room. Do you remember my “Snailed It” card below?

Or my personalized graduation card for Olivia?

How about my JOY Christmas card?

My Merry Christmas Scrapbook Page?

Four more reason’s why I cannot let these dies leave…and if you don’t have them in your stash, get them now! They are on sale and retiring as of May 2, 2022 or WHILE SUPPLIES LAST!